This post will give a basic introduction to Vuejs. Also, we will take a look at simple list implementation, with and without a component, to understand some important aspects in the framework.
What?
VueJS is a relatively new Javascript Framework.
Definition: “Vue (pronounced /vjuː/, like view) is a progressive framework for building user interfaces. Unlike other monolithic frameworks, Vue is designed from the ground up to be incrementally adoptable. The core library is focused on the view layer only, and is easy to pick up and integrate with other libraries or existing projects. On the other hand, Vue is also perfectly capable of powering sophisticated Single-Page Applications when used in combination with modern tooling and supporting libraries.”
Why?
-
Super easy to learn, if you are familiar with the obvious front end stuff, javascript, html, css. It’s even easier if you have worked with a library like Knockout. Most of the concepts are the same.
-
Very flexible. Vue offers a lot of things out of the box. From an SPA, to just using it for simple models on the UI.
-
Efficient dom manipulation. Uses virtual dom.
Enough of theory, lets go!
Hello World
Lets create a simple model, which has a text property. In vue, a model is created by instantiating a new Vue object.
var helloworld = new Vue({
  el: '#helloworld',
  data: {
    message: 'Hello Vue!'
  }
})
Now we have a model, that will get bound to an element with id - helloworld.
To display this message.
<div id="helloworld">
{{message}}
</div>
The mustache syntax is the most basic form of data binding.
Basics
A Vue model comprises of different properties.
dataThis is where you declare all the viewmodel properties that you want vue to check for changes. (observables in Knockout).methodsAny methods you want to define.watchAn object that contains all the model properties you want to observe, and react to (subscribe in Knockout).computedAn object that contains computed properties (computed functions in Knockout).
So, a basic model will look like this
var model = new Vue({
    el : "#xyz",
    data : {
        someProperty : ""
    },
    methods : {
        someMethod : function(x){
            console.log(x);
        }
    },
    watch : {
        someProperty : function(value){
            // call this function if someProperty changes
            this.someMethod(value);
        }
    },
    computed : {
        propertyChange : function(){
            // call this function if someProperty changes
            var value = this.someProperty;
            return "someProperty value changed to " + value;
        }
    }
})
As you can see, vue inherently provides structure to your code. Neat!
Binding
In the earlier hello world example, we used the mustache syntax to show the helloworld message. This is a one way binding. Any changes to the property in the viewmodel would reflect in the html, but the property cannot be modified from the UI itself.
We can bind a viewmodel property to an element using -
v-bindOne way binding, changes in the view model will be reflected in the UIv-modelTwo way binding, changes are written back to the view model as well.
<div v-bind:id="someProperty"></div>
<input v-model="someProperty"/>
The mustache syntax is valid only within html elements. To bind a property to an html attribute, like id. we make use of v-bind.
With the v-model directive, any changes the user makes in the input box is written back to someProperty in the model.
Simple List
Lets implement a simple list, over an array of objects. Each object has a selected property. On click on an item, we will toggle the selected property to true or false.
var model = new Vue({
    el : "#mylist",
    data : {
        mylist : [{
            id : 1,
            text : "First",
            selected : false
        },{
            id : 2,
            text : "Second",
            selected : false
        }]
    }
})
To loop over an array, we use the v-for binding.
<div v-for="item in mylist">
    <span>
    {{ item.text }} - Selected {{ item.selected }}
    </span>
</div>
This will render the list, and for each item say if its selected or not. Now lets add a method that will toggle the selected property.
var listViewModel = new Vue({
    el : "#mylist",
    data : {
        mylist : [{
            id : 1,
            text : "First",
            selected : false
        },{
            id : 2,
            text : "Second",
            selected : false
        }]
    },
    methods : {
        listItemClicked : function(item){
            item.selected = !item.selected;
        }
    }
})
<div v-for="item in mylist" v-on:click="listItemClicked(item)">
<span>
{{ item.text }} - Selected {{ item.selected }}
</span>
</div>On click of the div element, the listItemClicked method will be called, with the item object as parameter.
Done!
Components
Components are one of the most powerful features of Vue. They are meant to be used together. The most common case is a parent child relationship. Component A uses Component B in its own template. Thus, A will pass some data down to B. The question arises, should Component B be able to modify A’s data directly?
In Knockout for example, we often run into this situation where there are a lot of components being used, and data is being modified all over the place since there are no restrictions. This makes code unreadable, and debugging and testing a pain.
Vue makes sure components are as decoupled as possible. It doesn’t allow B to modify A’s data.
“In Vue, the parent-child component relationship can be summarized as props down, events up.”
A passes data to B. If A’s data needs to be changed, B notifies A with an event, and A modifies its own data accordingly. Wonderful!
Simple List with component
Let’s create a component which shows information for one list item. Lets call this component B. The item data will be passed from the parent ( Component A which in this case, will be listViewModel defined above ).
Vue.component("list-view-item",
    {
        props: ["item"], // parameters
        template: "#list-item-template"
    });
<template id="list-item-template">
<span>
{{ item.text }} - Selected {{ item.selected }}
</span>
</template>This sums up a basic item component.
props are parameters that are passed to the component.
In this case, the component list-view-item accepts a parameter called item.
Now lets see how to use the component in html.
<div v-for="anItem in items">
    <list-view-item v-bind:item="anItem"></list-view-item>
</div>
For each item in the items array, render a list-view-item component.
Here, v-bind:item is used to bind the value of anItem to the item property of list-view-item component.
This completes the same list implementation, but instead, with a component to render each item instead.
Now we need to add the click functionality.
How will it be different from our previous implementation? Because we have used a component, we have two different scopes. The parent’s scope, and the child component’s scope. Earlier we had only one scope.
Vue.component("list-view-item",
    {
        props: ["item"], // parameters
        template: "#list-item-template",
        methods : {
            itemClick : function(item){
                this.$emit("itemclicked", item);
            }
        }
    });
<template id="list-item-template">
<span v-on:click="itemClick(item)">
{{ item.text }} - Selected {{ item.selected }}
</span>
</template>On click, call the itemClick method. What this method will do, is emit an event, which can be caught by the parent component.
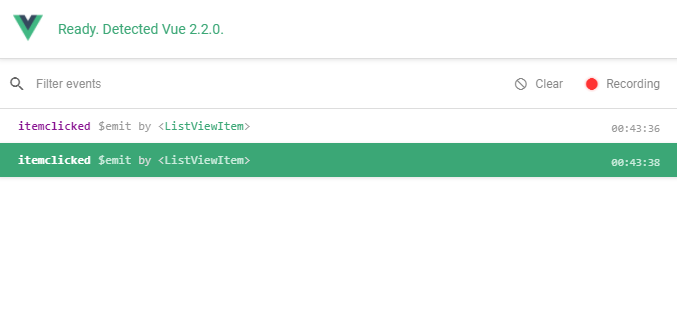
Make sure you have Vue Dev Tools installed to see whats going on under the hood!
The final step, is to add an event listener in the parent, so that we can take the necessary action when such an event occurs.
<div v-for="anItem in items">
    <list-view-item v-bind:item="anItem" v-on:itemclicked="listItemClicked"></list-view-item>
</div>
Summarizing this in plain english,
foreach item in items array
    render a list-view-item component, passing item as a parameter to it.
    if there is any event called "itemclicked" from list-view-item component, call "my" listItemClicked method
Here, “my” refers to the listViewModel.
Thats it!
// In the child component
this.$emit("itemclicked", item);
// In the parent
listItemClicked : function(item){
    item.selected = !item.selected;
}
Component A modifies its own data, Component B just notifies A that change is required.
Thus, by enforcing one way data flow, components are decoupled from each other. This means easier debugging, and components can be tested individually!